| Field | Entry | Comments |
|---|---|---|
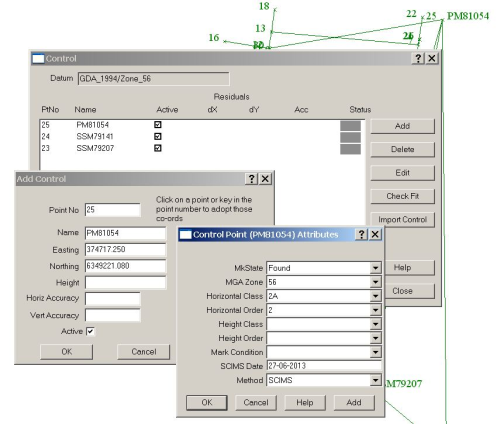
| Name | The Mark Name | From SCIMS |
| Easting | From SCIMS | |
| Northing | From SCIMS | |
| Height | From SCIMS | |
| Horiz Accuracy | Leave Blank | Not used by LandXML |
| Vert Accuracy | Leave blank | Not used by LandXML |
| Mark State | From field notes | Set by user |
|---|---|---|
| Horizontal Class | From SCIMS | |
| Horizontal Order | From SCIMS | |
| Height Class | Optional, if Control Point has a height | From SCIMS |
| Height Order | Optional, if Control Point has a height | From SCIMS |
| Mark Condition | Mandatory, select from list | Set by user |
| SCIMS Date | dd-mm-yyyy | From SCIMS |
| Method | Origin of co-ordinates | Set by user |